Which filters to use, why use them, when to use them, how to use them.
UV filter - Ultra Violet.

Ultra violet light forms a part of the light spectrum beyond the blue/violet end of the range. Ultra violet radiation is present at altitude but is scattered in the atmosphere closer to ground level. Ultra violet is a problem for film at altitude because the blue emulsion layer in film not only responds to blue light but also UV and so tends to overexpose and cause a blue colour cast in the image. This is particularly noticeable walking or skiing on mountains. A UV filter can be anything from pale yellow to clear, and is designed to absorb the UV light. A skylight filter is also designed to do this but it tends to be a light magenta or pink colour. The slight warming effect the filter has tends to give skin tones a lift and adds slightly warm tones to your photo.
Digital cameras tend not to be very affected by UV light so the use of a filter has limited benefits. And the fact is, most modern good quality lenses are coated for UV absorption anyway and don’t require any additional filtering. In tests, some cheaper generic “UV” filters were found to have almost no effect anyway!
Do you really need one?
Many photographers prefer to leave a UV or skylight filter permanently attached to each lens to act as a protective cover against scratches, dirt or moisture ingress. This is probably a good idea. Do you really need one? No, not really, not unless you are using lenses without a UV coating (unlikely) or you find that your high altitude, free-style skiing aerial survey photos are looking a bit blue! But I’d rather break a twelve quid skylight filter than a thousand quid lens so I use them on all my lenses.
Graduated Neutral Density filters (ND Grads)

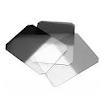
A set of graduated neutral density filters is a staple of any landscape photographers camera bag. The filter is normally rectangular and fits into a custom filter holder. The idea of having an over-sized filter that can be slid into a rotating holder is that you can position the transition area between clear and dark where-ever you need it and at any angle. The filter allows the photographer to darken the exposure of the lightest area of the scene (normally the sky) by 1, 2 or 3 stops, depending on the strength of the ND Grad filter being used. Why is this a good thing?
Why ND Grad’s are a good thing
We’ve all taken photo’s with washed out skies, right? The sky looked great to our eyes but when we exposed the photo, the landscape came out fine but the sky just went white, or grey or washed out and insipid. That’s because of the exposure difference between the lightest and darkest parts of the scene. Cameras have a limited ability to record extremes of light and dark in the same frame. They can cope with about 4 stops or exposure range. So if the sky is 5, 6 or 7 stops brighter than the landscape, it won’t record as anything except a white or washed out expanse at the top of your photo.
To get the colour and detail back into the sky, we need to make it darker - tone it down so it’s much closer to the rest of the exposure range in the photo. That’s what the ND grad filter does. Place the dark (dense) part of the filter over the sky, slide it around so that the transition between clear and dark (the graduated bit) is at the junction between sky and landscape. The filter won’t colour your sky, just make it darker, because its’ colour is “neutral” - it’s a neutral density, graduated filter.
You can stack them together to get more density if you need to. A 1 stop and a 3 stop gives you 4 stops of density and so on. With professional systems like Lee Filters, you get filter holders that enable you to stack several ND Grads but rotate them in different directions to gain fine control over the density or exposure of various parts of the scene.

Not all ND Grads are the same
Bearing in mind that you are going to stick these things things in front of your expensive, high quality lenses, you probably don’t want to be using cheap filters! For one thing, cheap ND Grads aren’t colour neutral - they tend to colour your skies a rather obvious magenta/purple. Also, they scratch easily and if strong side-lighting hits a scratched filter surface you get bad flare and ghosting.
Do you really need them?
Yes, you really do, but not all the time. Quite often with a digital camera, you can get away without an ND grad if the sky is only a stop or two above the landscape, as long as you capture a full dynamic range of tones from the black point to the white point and you don’t clip the whites. Then you can bring the sky back in during post production in Lightroom using the filters tool or in Photoshop using the blend or reveal all tools in layers. However, as soon as the contrast ration gets too strong, it’s only those ND grads that are going to save the day.
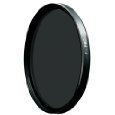
Polarizing filter
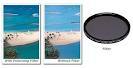
Light that is reflected from non-metallic surfaces becomes polarized but what this actually means is complicated and requires a certain amount of familiarity with wave forms, electro-magnetic fields and the way that electrons work - which is not something I’m going to try and explain here, even if I could! The effect this has on our photography is important though, because it causes reflections and glare. The polarizing filter helps to reduce or sometimes eliminate this.
Linear or circular?
Polarizers come in two types but we’re only interested in circular polarizers here because digital cameras don’t work with linear polarizers, they stop the auto focus system from working! So don’t buy one.
What effect do they have?
They have a very dramatic effect. They make colours look more saturated, skies look rich and dark, clouds stand out against the sky due to increased contrast, and most importantly, the reflections and glare from wet or shiny non-metallic surfaces are vastly reduced - but only at 90º or so to the sun. Metallic surfaces tend not to be so affected because of electro-magnetic fields (as I said - it’s complicated). The polarizer blocks the waves of light that cause reflections and you can control how much of this light is blocked by rotating the filter. Fortunately you can see the effect as you rotate the filter so you can judge how much polarizing effect to use.

Problems with polarizers?
Yes, there are some problems. It can be tempting to use the polarizer a little too often because it has such a dramatic effect, but like most things there’s a time and place and sometimes the polarizer is just overkill. There are also some specific problems using a polarizer.
The angle to the sun…
Polarizing filters only work in a narrow angle relative to the sun - roughly 90º - so if you point the lens towards the sun you get no effect and if you turn your back on your sun, again no effect. This brings another limitation into play…
Ultra-wide lenses
Don’t use a polarizer with an ultra-wide angle lens. Because the lens sees such a wide angle of view, the effect of polarized light across the whole field of view will be patchy and uneven and the photo will look blotchy, which is not a good look!
You loose two stops!
The other big problem with polarizers is that they are very dark. In fact most of them loose about two and a half stops of exposure. That means that for an exposure of 1/250 at f5.6 your looking at 1/40th second at f5.6 with a polarizer on - so a tripod is going to be essential. No problem for the landscape photographer who will be using one anyway but something to be aware of.
Best case scenario
Where the polarizer really comes into its own is with foliage and wet rocks, particularly doing waterfall landscape type shots. The polarizer not only cuts out reflections on the water, it cuts out glare from leaves and foliage so you see the true colours underneath, it cuts hot-spots of shine off the wet rocks and it cuts exposure down so you use a slower shutter speed which is good for flowing water - win/win!
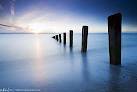
Big Stoppers - 8 or 10 stop neutral density filters
“Big Stoppers” have become very popular in recent years bringing with it the possibilities for unusual landscape images that exploit very long shutter speeds in bright sunlight. A neutral density filter is just a piece of dark glass in front of your lens. The darker the glass, the longer your exposure will be. A neutral density filter is “dense” (dark) but “neutral” (it has no colour). You can buy ND filters in 1, 2, 3 or more stops of darkness and the big stopper takes this to the extreme - 10 stops of darkness!
Imagine you go out on a bright sunny day, down to the beach. The waves are crashing on the beach and the surf is up. So is the sun - it’s very bright and the light is very harsh, very direct. Not usually the best ingredients for a landscape photo. The exposure at 100 iso will be around 1/250 second at f8. However, bolt on a 10 stop ND Big Stopper and your shutter speed at f8 will plummet by 10 stops to 4 seconds! 4 seconds at f8 in the middle of the day. Think what you could do with that, with all that moving water on the beach. It will all blur into a silky sheen but you still get the sun and the shadows - might be interesting eh?
Other filters
There are lots of other filters available too. Some of them are useful, some of them are novel and some of them are just daft! There are colour correction filters but white balance does this job much of the time for you. There are colour effects filters, colour the sky to look blue or pink or red or whatever colour you like. There are star-burst filters and flare filters and so on. Photoshop does this for you. There are contrast filters for black and white photography but again, much of this can be achieved in Photoshop.
Essentially, most pro photographers have the filters I’ve described above and that’s about it.
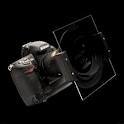
Filter size and thickness
It may surprise you to learn that there is a “standard” filter size. At least in terms of professional use. Most pro lenses have a filter thread size of 77mm. This means that you only have to buy one filter and it fits all your lenses. If you have round, screw-on filters that are not 77mm diameter, you must use step-up or step-down rings to convert your filters to fit different lens filter threads. Even square or rectangle slot-in filters like Lee need to go into a filter holder and that has to screw into the front lens element. So you want to have the right step rings or mounting rings for the holder and you don’t want to have to carry too many of them - hence the standard 77mm thread size adopted by many lens makers for pro lenses.
Filters also have a certain amount of depth to them. In other words they stick out in front of your lens. That’s no problem when you are using a telelphoto but with a wide-angle lens there’s a chance that the lens could “see”the edge of the filter and cause a small vignette. So you can get common filters in special “thin” versions that are suitable for use with ultra wide lenses.
No comments:
Post a Comment