
Saturday, 17 March 2012
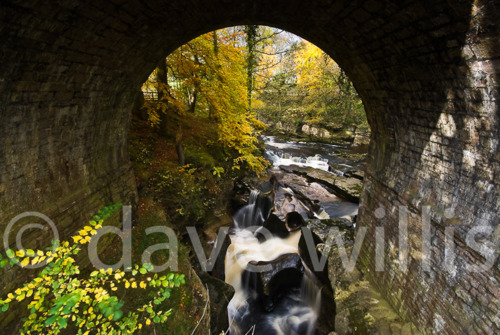
Week 15 Assignment 2 Creative use of apertures
Saturday, 10 March 2012
Week 14: Assignment 1 Creative use of Shutter Speeds
If this is the first post you are reading on The Complete Level 2 Photography Course, stop! Read the preceding 13 posts first!
Here it is, the first assignment. It's pretty easy really. Won't take too much time. All you have to do is research, plan, test and shoot two photographs. The first will be "creative use of a fast shutter speed" and the second will be, you guessed it, "creative use of a slow shutter speed". By "creative use" I mean thinking up a shot that really uses the attributes and benefits of shutter speeds to create a picture that looks great.
Week 13: Unlucky; it's time to do some work! How to do the assignments
 If you really want to improve your photography it's time to stop reading and start shooting - and writing! Yes, that's right. In order to learn stuff you have to get practical and go out and practice, practice, practice. And then, in order to absorb what you just did you need to review it and the best way to do that is to write about it - like I do.
Friday, 9 March 2012
Week 12: Professional workflow. Get sorted
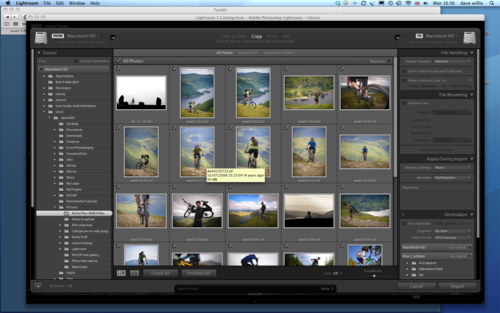 Industry “best practice” for handling workflow with RAW and Jpeg images.
Having a clear framework for digital image production, editing and output is vital for photographers to be able to organise, archive and locate their images day to day, month to month and year to year. You don’t want to waste time doing basic image editing and admin tasks that could be automated in a simple and effective workflow that starts with downloading your photos from your camera…
Week 11: Post production. A quick guide
A guide to help you handle image post production, develop your images, file handling and output…
This is never going to be an exhaustive tutorial. In fact it will barely scratch the surface. Image post production is a vast and complicated subject but that doesn’t matter because all we need to do here is to get your photos out of your camera and onto your website/blog page/Facebook or whatever with the minimal fuss and bother.
Week 10: See the light. Fill-in flash

Nearly all modern DSLR and Bridge style cameras have a built in flash, until you get to the “Pro” models, which assume you will be using a more powerful and flexible speedlight on the cameras hotshoe.
The little pop-up flash is more useful (and more powerful) than you many people think and we’re going to take a look at how to get the best out of it and in what situations it can be applied.
Week 9: Flash, ah ha...saviour etc.

Modern film and digital camera’s use three basic ways of measuring and controlling flash exposure so let’s have a look at them in turn.
Week 8: The filter factor
Which filters to use, why use them, when to use them, how to use them.
UV filter - Ultra Violet.

Week 7: Lenses are us! All about glass
We all know about lenses right? Wide angles, telephoto, zoom; what about variable maximum apertures, image stabilization, fish-eyes and mirror lenses? Here’s all the info.
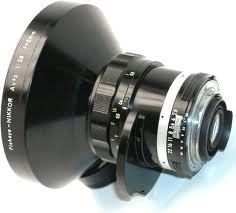
How does auto-focus work and what really is the sharpest aperture on a lens? let’s have a look…
We’ll start with wide lenses and work up
Week 6: White is right; all about white balance
Week 6: White Balance
The white balance control on the camera is designed to calibrate the camera’s exposure system to capture images that display natural colours under different lighting conditions.
Think of white balance as a way of making sure that a sheet of white paper actually looks white in your photo.
Week 5: Feeling exposed. Exposure comp and histograms

All about exposure and histograms…
It’s possible that you have used a camera for a long time, exploiting the auto programs and modes without really grasping any of the principles of exposure, metering or interpreting histograms.
Week 4: Let's work together. ISO, shutter and apertures

The final piece in the “exposure” jigsaw is ISO. What is it and what does it do?
ISO is measure of the cameras sensitivity to light. You may remember it from shooting film, where we sometimes called it “film speed’.
Week 3: Look sharp! Apertures for depth of field
Apertures. What are they, what do they do for us and how do we use them?
Week 2: Control that motion. Shutter Speeds

The camera has two ways of controlling exposure. It has apertures and it has shutter speeds.
So the shutter speeds can act as a simple variable system for controlling exposure by adjusting the timing of the exposure - more time for dark subjects in low light, less time for bright subjects in bright light. But there’s more to it than that…
Week 1: Drive the camera. Camera Modes
We're going to start by learning how to drive the dslr camera:
Many camera users (as opposed to photographers) leave their camera in one single mode, Auto mode and don’t get any further than that. Sure, the camera will produce good exposures for you most of the time in the Auto mode but it's no thanks to you. You are locked out of the process, you play no real part in the decision making and when the camera doesn't get you a good result you may not know how to fix it.
Subscribe to:
Posts (Atom)